Easy Overnight Waffles (No Morning Stress)
Awaken to golden, crunchy waffles with this simple overnight waffle method. Prepare the batter the evening prior for an effortless, bakery-style morning meal that everyone will adore.
Traditional Old World Overnight Waffles
There’s something subtly indulgent about breakfast already prepared for you.
The previous night, as the kitchen dims and the day fades away, you combine a straightforward batter, warm milk, a hint of yeast, and a promise of something leisurely and delightful. It sits while you slumber, rising softly and transforming.
By dawn, the home emanates that unmistakable aroma, warm, yeasty, reminiscent of freshly baked bread. The waffle maker hums, the batter sizzles, and suddenly breakfast seems less like a chore and more like a small present you’ve prepared for yourself.
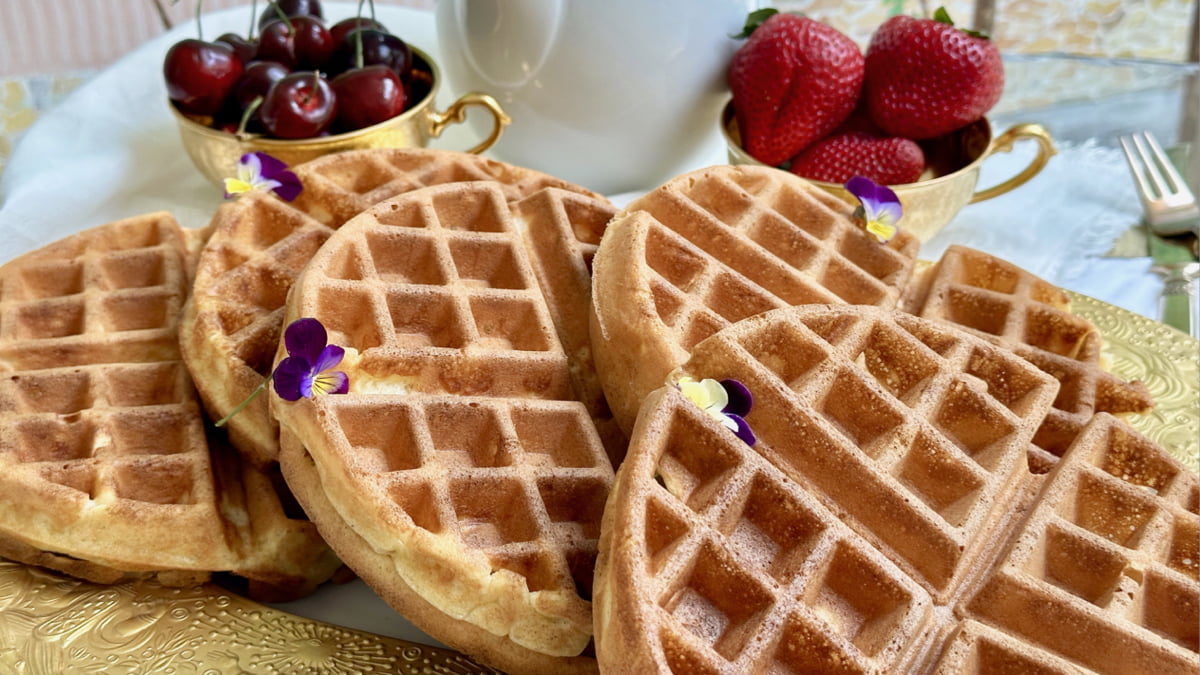
These effortless overnight waffles have crisp edges, tender interiors, and are delightfully light, crafted not in haste, but with care.
Why Overnight Waffles Are Superior to Conventional Waffles
Let’s not confuse these traditional yeast waffles with those quick pancake recipes that are made in a waffle iron, commonly referred to as ordinary waffles: not all waffles are made the same.
Most standard “American-style” waffles derive from a batter similar to pancakes using baking powder. They’re acceptable… but they tend to be cake-like, soft, and often flat.
Overnight Waffles, on the other hand:
- Utilize yeast for leavening rather than baking powder.
- Develop a fluffy, airy interior and crispy golden exterior.
- Feature deep pockets that capture every bit of syrup, butter, fruit, or whipped cream.
- Taste richer due to butter, eggs, and a slow-rising batter.
These aren’t mere waffles, they represent breakfast nobility. The only similarity lies in the toppings we decide to place upon them.
Components That Enhance These Overnight Waffles
- Instant yeast – The highlight of traditional Belgian waffles. Yeast forms small air pockets while the batter rests, imparting the waffles their characteristic light interior and rich flavor unattainable from baking powder.
- Warm water activates the yeast and hydrates the flour. The water should feel like a warm bath; too hot will kill the yeast, while too cold will slow the rising process.
- All-purpose flour supplies structure. It’s robust enough to hold the bubbles from the yeast, yet still soft enough to keep the waffle light and delicate.
- Cinnamon or Cardamom imparts warmth and fragrance, making your kitchen reminiscent of a bakery. Optional, yet it gently enhances the taste without overwhelming.
- Salt, just a dash balances the sweetness and amplifies every other ingredient. Without salt, the waffles taste one-dimensional.
- Large eggs, separated – Egg yolks contribute richness and fat, providing the batter a silky consistency and a golden hue, while the egg whites, when whipped separately and incorporated back into the batter, lend lift and extra crispiness to the edges.
- Sugar sweetens the batter while also aiding in caramelizing the surface of the waffle for a beautiful brown finish.
- Whole milk adds moisture, richness, and helps form a smooth, pourable batter. Whole milk is preferred for flavor and browning.
- Unsalted butter enhances everything! It adds a buttery taste, tenderizes the waffle, and assists in creating those crunchy, golden edges.
Essential Tools
- Belgian Waffle Maker produces deeper pockets and thicker waffles compared to standard irons, allowing for crispy edges and fluffy centers.
- 3 Mixing bowls – 1 large and 2 medium, one for the batter, one for egg yolks, and one for whipping egg whites, ensuring everything remains neat and properly layered.
- Measuring cup and spoons – accuracy is crucial with yeast and flour. Too much or
- Insufficient quantity and your consistency will alter.
- Small saucepan – to melt butter – ensuring it melts without turning brown.
- Hand mixer or stand mixer efficiently whips egg whites to firm peaks, enhancing lofty fluffiness.
- Tongs for securely lifting hot waffles from the iron, preventing your fingers from tearing or burning.
- Wooden spoon is perfect for gently incorporating whipped egg whites into the batter, avoiding their collapse.
How To Prepare Overnight Waffles
For these simple overnight waffles, we first need to incorporate a bit of instant yeast into our mixture. Here’s the process:
- Combine the mixture using milk, yeast, eggs, butter, and flour.
- Allow it to rest, either for 1 hour at room temperature or overnight in the refrigerator.
- Cook using a Belgian waffle iron to achieve that signature crispy outer layer and soft interior.
Preparing ahead is beneficial. You can even create the batter while tidying up after dinner, store it in the fridge, and awaken to batter ready to cook!
I frequently double the quantities (as shown in my video), which yields about 20 large, perfectly cooked waffles.
https://www.youtube.com/watch?v=wRSJFXYrTiE[/embed>
Make Them Sweet Or Savory
What’s one of my favorite aspects of this recipe? Its adaptability.
- Traditional sweet version: Retain the sugar and embellish with berries, maple syrup, whipped cream, or powdered sugar.
- Savory brunch waffles: Exclude the sugar and mix in diced fresh herbs or cheese. Add smoked salmon, poached eggs, or crispy bacon for a brunch delight.
This recipe is simple to double, making it ideal for holiday brunch gatherings or perfect for bridal showers and ladies’ get-togethers.
Guidelines For Crispy Waffles Each Time
As with any baking recipe, a few strategies can make the distinction between a dish you’ll frequently prepare and one that seems daunting. These are straightforward tips, and they are effective!
- Opt for instant yeast for ease.
- Permit the mixture to rest; this step enhances flavor and texture.
- Avoid overfilling the waffle iron; the batter will expand during cooking.
- Store leftovers in the freezer and reheat in the toaster for swift weekday mornings.
Preparing Waffles For Television
Can you imagine, while competing in The Great American Recipe with PBS, I opted to make waffles and fried chicken in under 60 minutes!
Naturally, I couldn’t utilize this specific recipe, as it requires an hour for the batter to ferment and attain a richer mixture. I did, however, add a pinch of yeast to my batter and allowed it to rest as long as possible while frying some chicken for a Chicken and Waffle sandwich.
The outcome exceeded my expectations, and I still advanced to the next round!
What To Accompany Overnight Waffles
While high-quality maple syrup or honey with a selection of fresh fruit creates ideal sweet waffles for breakfast, let’s not confine ourselves!
https://www.youtube.com/watch?v=ttVjmyHX9zI[/embed>
Transform this timeless recipe into a savory breakfast or brunch, and serve them akin to classic Herb Crepes.
Or with cured salmon, mascarpone, chives, and a poached egg atop, as I prefer to do over Potato Latkes. This is a delicious choice I prepare for Mother’s Day or any festive brunch.
For an indulgent packed meal, take any remnants of waffles and spread a layer of peanut butter or Almond Butter, into those stunning deep pockets with a Strawberry Jam or Fig Jam, and wow, you have an amazing lunch!
Step By Step Visual Guidelines
A step-by-step video is available above, but for those of us who are old-school and enjoy gazing at detailed images of how to execute something, I have included those for you here.
The recipe is straightforward, despite the fact that you will need to soil three distinct bowls to create the batter. Once prepared, the cooking of the waffles is rather swift for these stunning fresh waffles.
Step 1 – Dry Components
Ultimately, all components will be incorporated into the dry ingredients, so opt for a spacious bowl for the flour and spice blend, and set this aside.
Step 2 – Yeast
As the majority of the moist ingredients will be combined with the ‘bloomed’ yeast, place the yeast and warm water in a medium-sized bowl.
Allow the yeast and warm water to rest for approximately 10 minutes to bloom, or awaken.
Step 3 – Egg Whites
In a third bowl, whipping the egg whites until light and firm is crucial for crafting an airy waffle batter.
Whip them in a medium bowl and put them aside. The egg whites will be folded in last.
Step 4 – Combining The Wet Mixture
By the time you have whipped the egg whites, the yeast will have activated.
Incorporate the yolks and sugar into the yeast mixture and whisk until light and creamy.
Stir in the melted butter and milk, whisking until reaching a pale yellow.
Step 5 – Merging The Wet Ingredients With The Dry Ingredients
Gradually whisk in the creamy egg and milk blend into the dry components.
Blend until the lumps are combined, resulting in a creamy batter.
Step 6 – Incorporating The Whipped Egg Whites
Now that the batter appears rich and creamy, it’s time to fold in the whipped egg whites.
Once you incorporate them into the batter, remain patient as you gently whisk the egg whites into the mixture until it becomes creamy once more.
Step 7 – Patience!
This is what differentiates an overnight waffle batter from an American ‘quick’ waffle batter; yeast.
The yeast requires time to activate all of the batter ingredients and to ferment, so to speak.
Cover the bowl and let it rest at room temperature for an hour, if you plan to cook the waffles on the same day.
Otherwise, place the covered batter in the fridge overnight. The next day, let the batter sit out for 30 minutes before proceeding to cook the waffles.
Step 8 – Prepare The Waffles
Following the manufacturer’s guidelines on preheating the machine, ensure it is hot and ready to cook the waffles.
Approximately one-third of a cup of batter is placed into the heated waffle iron and is closed to begin cooking.
Numerous waffle irons feature an alert to indicate when the waffles are fully cooked, so refrain from opening it while cooking.
I discovered it most convenient to extract the fluffy, cooked waffles using small tongs or wooden chopsticks, which assist in lifting the waffle from the compartments of the iron.
How To Preserve & Reheat
- Chill: up to 3 days
- Freeze: up to 2 months
- Reheat: toast or oven for optimal crispiness
Avoid using a microwave if maintaining crispiness is desired.
Frequently Asked Questions
Can I chill the batter instead of letting it sit out?
Indeed, this hampers fermentation but remains effective.
Why opt for yeast instead of baking powder?
Yeast produces a lighter consistency and richer flavor.
Can I prepare these without dairy?
Absolutely, utilize plant-based milk and butter alternatives.
-
Electric Waffle Maker
-
3 Mixing bowls
-
Hand mixer or stand
- 1 1/3 cups Warm water
- 2 tsp Instant yeast
- 3 cups All-purpose flour
- 1 tbsp Cinnamon or cardamom
- 1/4 tsp Salt
- 3 Egg yolks large eggs
- 4 Egg whites
- 1/3 cup Sugar
- 1 1/2 cups Whole milk
- 8 tbsp Melted butter unsalted butter
-
In a large mixing bowl, combine the flour, cinnamon, and salt and set aside.
-
In another bowl, a medium-sized bowl, mix the yeast, a dash of sugar from the measured amount, and 1/3 cup of warm water. Allow it to proof for 10 minutes.
-
In a third bowl, add the egg whites and whisk until soft peaks are formed. Set aside.
-
Using a whisk attachment on either a hand mixer or stand mixer, blend the sugar into the yeast combination. Incorporate the egg yolks, leftover water, milk, and melted butter. Whisk until the egg-milk blend turns a light yellow hue.
-
With a wooden spoon, combine the wet components with the dry ingredients. Carefully fold in the beaten egg whites. Cover the mixture and let it rest at room temperature for an hour, or refrigerate it until the following day.
-
When prepared to cook the waffles, remove the waffle batter from the refrigerator 30 minutes prior while preheating the Belgian waffle iron according to the manufacturer’s directions.
-
Once the Belgian waffle maker is heated, if it requires non-stick cooking spray, apply a light mist at this stage. Many are non-stick, so refer to your machine’s guidelines. Pour sufficient batter to swiftly cover the bottom of the waffle grid, approximately 1/3 cup, and then close the appliance to cook the waffle, around a minute or as specified by your device. Sometimes, the first waffle acts as a tester, but the subsequent ones will be quick.
-
If serving immediately, keep them in a warm 200-degree oven until all waffles are prepared. If serving later, place each waffle on a cooling rack to cool completely to preserve the crispiness, and store in an airtight container in the refrigerator for a few days. When ready to serve, arrange on a baking sheet and warm in a 250-degree oven until the waffles are heated through.
Waffles, after being cooked, can be stored in a freezer-safe airtight container, thawed, and reheated for another occasion.


Post Comment