Easy Color and Texture for Food Photography
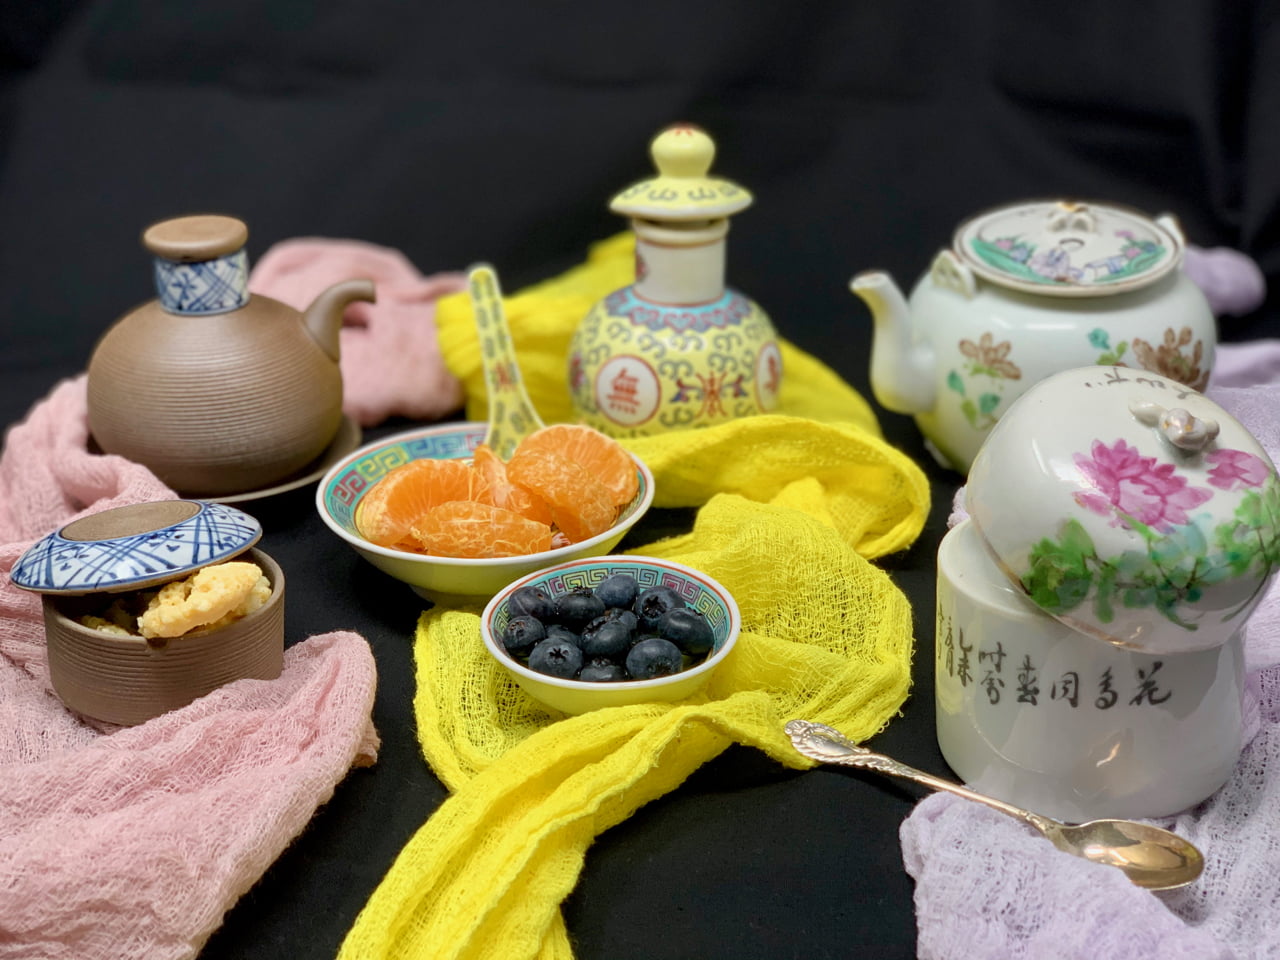
Tinting cheese cloth with natural ingredients, to utilize as texture and hue in culinary photography, resembles the process of coloring Easter eggs. Here’s the method!
Culinary Photography
Aren’t we all culinary photographers nowadays! Whether dining out or cooking at home, we have evolved into a society that recognizes the elegance nature brings to our spectrum of colors through its cuisine.
Texture and hue are crucial aspects in any image. Although the food itself might not always be the most stunning subject captured, we have significantly progressed in our ability to enhance its allure in a still image.
Hue and Texture
These elements significantly influence the ambiance or tone of a specific food photograph; metal, wood, color, and textiles.
Although I have been passionate about textiles for the majority of my life, starting to sew at twelve, I have specific textiles I enjoy working with.
Silk, cotton, and natural fibers create stunning texture in garments, upholstery, or table settings.
I sought a lightweight and ethereal fabric that I could seamlessly incorporate into my images without overpowering the shot. Something with a bit of an ethereal appearance.
Cotton gauze, which is the same fabric utilized in cheese cloth, captured my attention. It’s quite inexpensive, available in long rolls to cut as needed, and being raw cotton, I anticipated it would absorb dye readily.
I preferred to use various foods as the dye. Many of the ingredients I utilize in cooking possess such vibrant pigments; after all, isn’t that the origin of dye?
Food As Dye
How many times have we attempted to peel beets, whether golden or red, or turmeric, cabbage, or other vegetables, only to recall that we should have donned gloves first?
Those are the foods from which one can derive the most vibrant dye from on the cotton gauze. Oh, and remember to wear gloves!
When I was younger and we would color Easter eggs, the colors were always so vibrant and striking.
But then you go to peel the egg to consume it, only to discover the dye has also tinted the egg white. I didn’t wish to consume that synthetic dye, and I certainly didn’t want my children eating it either.
It was during that time (1980s) that I started exploring food as dye. Certain foods need a longer soaking duration compared to others.
Uncertain why, but adding a drop of vinegar to the water enhances the dye’s intensity and absorption into the fabric.
How To Naturally Dye Fabric or Eggs
Once you have selected the hues you will employ, roughly chop those food items, place them into pots of water with 2 tablespoons of white vinegar, and boil the ingredients.
Submerge the dry pieces of white cotton cheese cloth entirely into each pot. Let it steep for about an hour.
Wearing gloves, squeeze out excess liquid, hang to dry (preferably outside, as drips will leave stains), and once dry, the cloth is ready for use.
I have only recently learned about a charming dried flower petal, Butterfly Pea Flower Tea, which boasts a vivid blue or purple hue.
I prepared a loaf of bread utilizing the tea within the water of the dough. The secret to this tea, if you desire blue as the hue, there must be no acid, so refrain from using vinegar in the dye water.
A splash of acid promptly changes the tea to purple and would tint the fabric a beautiful lilac shade.
Required Ingredients
- Water
- Red Cabbage
- Red Beets
- Gold Beets
- Turmeric
- Black tea
- Butterfly Pea Flower Tea
- White Vinegar
Essential Equipment
- A few 4 quart pots
- Cheesecloth
- Tongs
- Drying rack
- Water – 4 quarts for each pot
- Red Cabbage – 1/4 head, for light purple
- Red Beets – 1 whole beet, for vibrant magenta
- Gold Beets – 1 whole, for light yellow
- Turmeric – 1 root, for bright yellow
- Black tea – 2 tbsp, for earthy beiges to brown
- Pea tea – 4 petals, for blue or lilac
- White vinegar – 2 tbsp for each pot, excluding blue Pea tea
-
Roughly chop each ingredient being utilized. Place in separate pots of boiling water combined with vinegar. Reduce heat and let simmer with a lid for 30 minutes.
-
Take out the food components from each pot and gently press each cotton gauge strip into its respective pot. Let it soak for one hour.
-
Carefully, wearing gloves, squeeze out any excess liquid and hang to dry, ensuring to protect the floor beneath from staining drips.
-
Once dry, they are prepared for use.
Post Comment