Gluten-Free Pancakes
If you’re a pancake enthusiast, this recipe is tailored for you, whether you’re avoiding gluten or not! This simple recipe requires one nutritious flour—oat flour—and essential ingredients like Greek yogurt, maple syrup, butter, and eggs. (If you lack oat flour, you can easily create your own by blending old-fashioned or quick-cooking oats in a food processor or blender.)
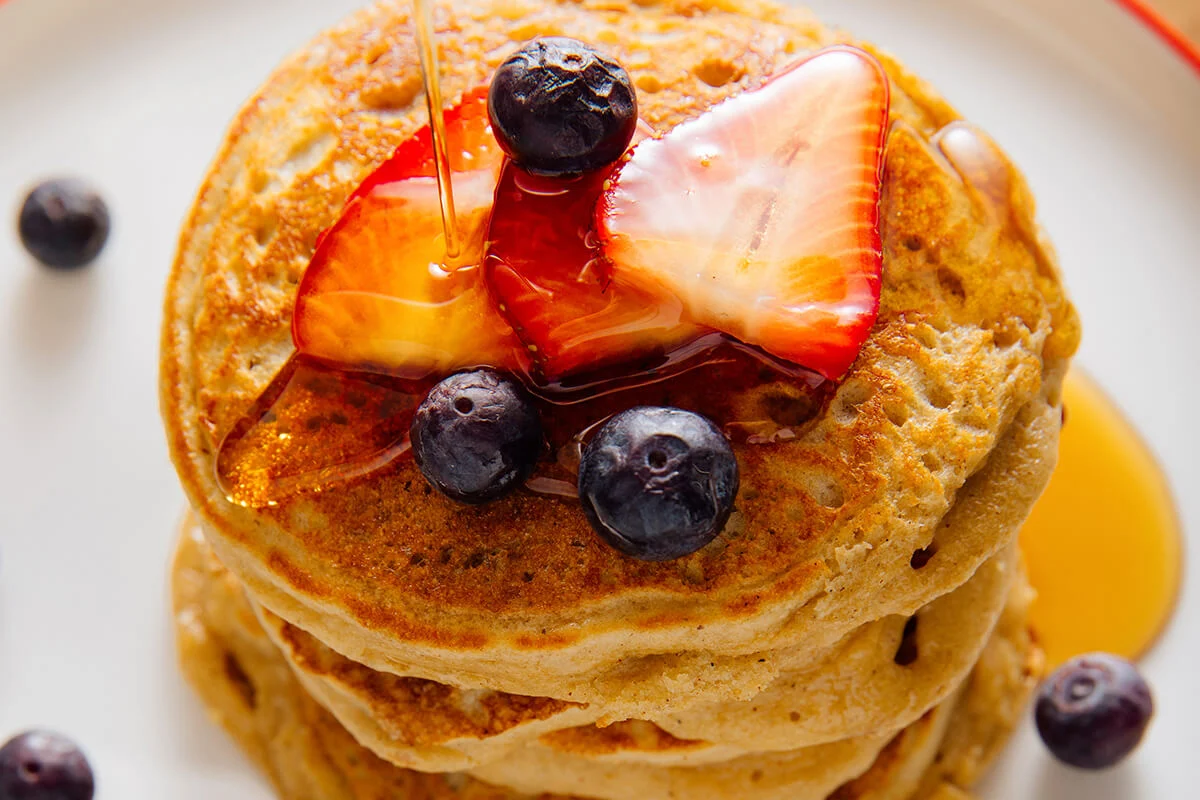
These amber pancakes are airy and delectable, with a hint of oatmeal taste. The yogurt adds a slight tang reminiscent of buttermilk, together with some additional protein, and the maple syrup provides more flavor compared to regular sugar.
It’s fair to claim that these pancakes are more nutritious than your typical pancake stack, particularly when you opt for wholesome toppings to accompany them. Most importantly, they make for a delightful treat to serve during weekends, and they reheat wonderfully for quick breakfasts on weekdays.
Tips for Oat Flour Pancakes
Culinary pancake preparation is indeed an art! These suggestions will assist you as you create your initial batch.
Allow the batter to sit for ten minutes. This grants the oat flour the chance to absorb some moisture, leading to pancakes that are light and fluffy.
Ensure your batter has the appropriate consistency. The batter shouldn’t be overly runny or so thick that it’s hard to stir. It is just right when you can pour some batter into a pan to form a nice round shape without aiding it to spread. If needed, add up to 1/4 cup of milk to help thin the mixture.
Gently coat your griddle or skillet with oil or butter. I prefer cooking my pancakes with avocado oil due to its high smoke point and neutral taste (butter burns much faster). Regardless of what you choose, be sure to wipe away any excess with a paper towel to prevent smoking.
Always begin by cooking just one pancake. After you’ve practiced with one pancake and confirmed that your skillet is adequately preheated, you can prepare more simultaneously. Leave a couple of inches between each pancake for easy flipping.
The pancakes are ready to turn when about 1/2-inch of the edge has transitioned from glossy to matte. Don’t anticipate seeing bubbles forming around the edges for this recipe. The underside should be a lovely golden at this point. If unsure, it is wiser to wait a little longer than risk ending up with a doughy mess.
As you proceed, reduce the heat. The skillet becomes hotter as time progresses. If your pancakes are burning on the outside before being cooked through inside, your skillet is too hot. Decrease the heat slightly after every few pancakes.
Watch How to Create Gluten-Free Pancakes
Suggestions for Serving Pancakes
These pancakes are delightful with classic pancake toppings as well as more nutritious options. Here’s a list of toppings or accompaniments that you may enjoy with your pancakes.
Additional Gluten-Free Pancake Recipes
I enjoy making pancakes with healthy gluten-free flours like oat flour, almond flour, and buckwheat flour. Here are six more pancake recipes to indulge in:
Please share how your pancakes turn out in the comments. I value your feedback and always look forward to hearing from you.
Print
Gluten-Free Pancakes
This gluten-free pancake recipe utilizes oat flour, yielding pancakes that are light, golden, and scrumptious. They’re simple to prepare with basic ingredients. Recipe yields approximately 10 pancakes.
- In a small mixing bowl, combine the yogurt, butter, and maple syrup. Crack the eggs into the bowl and whisk until the mixture is adequately blended.
- In a medium-sized bowl, mix the oat flour, baking soda, salt, and cinnamon. Use a large spoon to combine the ingredients thoroughly.
- Pour the wet ingredients into the bowl of dry ingredients. Stir just until the mixture is incorporated (be careful not to overmix, or you’ll lose the air bubbles that make these pancakes fluffy). If you’re including any mix-ins, gently fold them in now.
- Allow the batter to rest for 10 minutes to thicken. In the last minute or two, heat a large stainless steel or nonstick skillet over medium-low heat. (Or preheat an electric griddle to 325 degrees Fahrenheit).
- Once the surface of the pan is sufficiently hot that a drop of water sizzles, lightly oil or butter the skillet, wiping away any excess with a paper towel. Pour ¼ cup of batter onto the pan. Let the pancake cook for approximately 3 to 4 minutes, until the edges are more matte than shiny and the underside is golden. (If your batter is so thick that you have to assist spreading the pancake, thin the mixture with milk as necessary).
- Once the bottom side has cooked properly, flip it with a spatula and cook for another 90 seconds or so, until golden brown on both sides. You may need to reduce the heat at this stage. Repeat with remaining pancakes, oiling the pan and lowering the heat as necessary.
- Serve the pancakes right away or keep them warm in a 200-degree Fahrenheit oven. Leftover pancakes store well in the refrigerator in an airtight container for up to 5 days or in the freezer for up to 6 months. Gently reheat before serving.
Notes
Recipe modified from my Blueberry Lemon Yogurt Pancakes and Caramelized Peach and Oat Pancakes.
*Yogurt choices: I’ve successfully used plain, low-fat yogurt and whole-milk Greek yogurt.
**Create your own flour: Be certain to use certified gluten-free oat flour or oats. To produce oat flour from old-fashioned oats, pour one cup of oats into a food processor and blend until they’re finely ground, resembling the texture of fine sand. See how this process works here.
***Switch it up: Add up to 1 cup of mix-ins like toasted chopped nuts, fresh blueberries, or chocolate chips.
Nutrition
The information presented is an estimate provided by an online nutrition calculator. It should not be regarded as a substitute for advice from a professional nutritionist. See our full nutrition disclosure here.
Post Comment