Seasonal Fruit Tart Recipe (Dairy and Non-Dairy Custard Options)
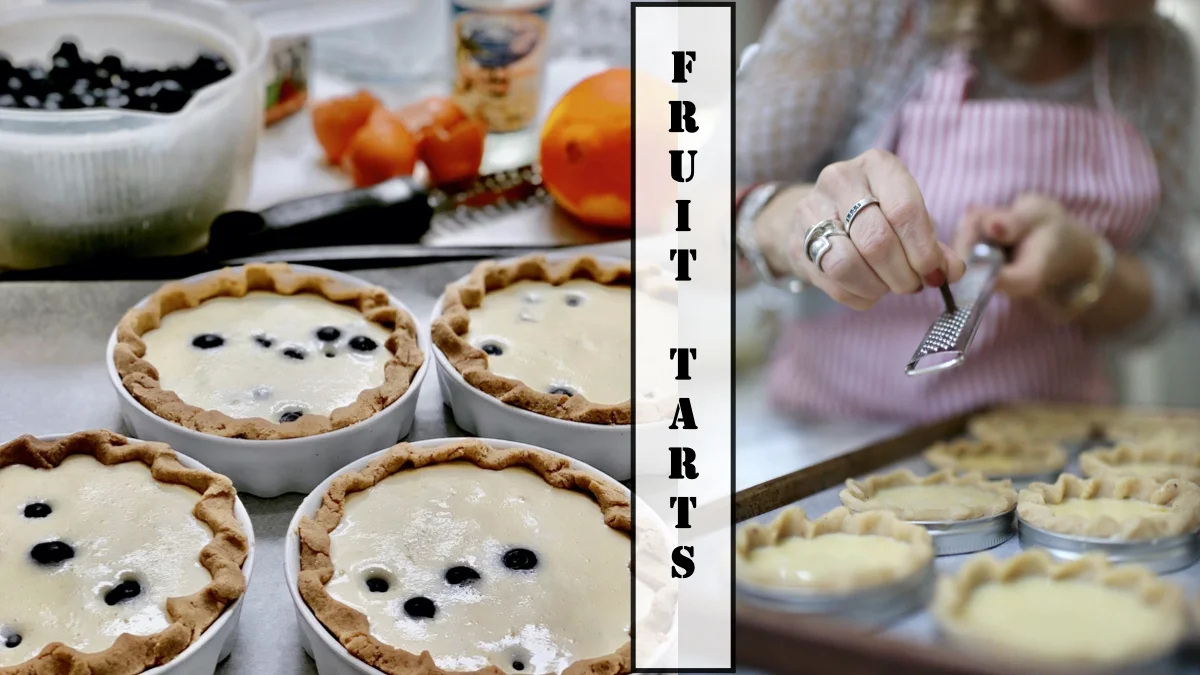
These seasonal fruit tarts showcase a buttery or coconut oil crust accompanied by your selection of dairy or non-dairy custard, adorned with fresh fruits such as strawberries, blueberries, raspberries, or other preferences.
Seasonal Fruit Tart Recipes for Everyone
There’s a specific instance in late spring, just as the air warms and berries start to flood the markets, that demands something straightforward, beautiful, and slightly indulgent.
A tart is precisely that.
Not complicated, not excessively sweet, but quietly mesmerizing. A crisp, gentle crust. A creamy filling that can range from rich to light based on your mood. And fruit, always the fruit, artfully arranged, imperfectly, like something foraged rather than styled.
This recipe is intended to adapt with the season. With what you possess. With how you collect. With what you favor.
Whether you opt for mascarpone for a traditional richness or coconut cream for a lighter, dairy-free option, these petite tarts transform into whatever you require them to be—a midday delight, a brunch centerpiece, or a serene dessert at the conclusion of a long day.
Reasons to Adore These Seasonal Fruit Tarts
These tarts are crafted for adaptability and ease:
- A single crust, numerous variations
- Dairy and non-dairy custard selections
- Ideal for strawberries, blueberries, or raspberries
- Simple to prepare as individual tarts or one large centerpiece
- Lovely for entertaining, effortless for everyday
What Distinguishes A Pie from A Tart?
The most basic difference is that a pie typically has filling encased within a crust, while a tart resembles more of an uncovered pastry with filling resting in a shallow shell. There exists, however, the pumpkin pie, sweet potato pie, and white potato pie (a traditional pie from Maryland), that are open-faced.
In general, a pie usually has both a bottom crust and an upper crust. A tart consists of only a bottom and sides, with the filling exposed on the surface, making it ideal for topping with fruit.
Once you’ve savored these seasonal fruit tarts, as autumn approaches, you may wish to indulge in some of my pies!
Selecting Your Custard – Dairy vs Non-Dairy
This recipe performs beautifully with either choice:
Mascarpone Custard (Dairy Option):
- Rich, creamy, slightly tangy
- Classic bakery-style taste
- Ideal for strawberries and raspberries
Coconut Cream Custard (Non-Dairy Option):
- Light, delicately sweet, and fragrant
- Especially pairs delightfully with blueberries and citrus zest
- A fantastic substitute for dairy-free diets
Both bake identically and maintain their shape once cooled.
The Ideal Tart Crust (Buttery or Coconut Oil)
This crust is delicate with just enough integrity to support the custard.
You have the option to choose:
- Butter for a traditional, flaky texture
- Coconut oil for a dairy-free, slightly nutty flavor
Incorporating crushed nuts adds a subtle decadence and lends a more rustic, seasonal feel.
Best Fruits for Seasonal Tarts
Utilize what’s fresh and in season:
Ingredients for Seasonal Fruit Tarts
For the Tart Crust
For the Tart Crust
- Flour
- Butter or coconut oil
- Crushed nuts (almonds, pecans, or walnuts)
- Sugar
- Salt
- 1 egg
- Cold water
Why These Ingredients Are Effective
A quality tart begins with a crust that is simultaneously tender and structured, capable of holding the custard without becoming weighty.
Butter or coconut oil – Butter yields a traditional flaky tart crust with rich taste, while coconut oil presents a dairy-free alternative with a light, slightly nutty finish. Both create delightful results depending on your desire.
Flour
– The base of the tart pastry, providing it with form while still permitting a soft, crumbly consistency. A gluten-free flour can definitely be exchanged for the all-purpose flour.
Crushed nuts – Incorporating finely ground almonds, pecans, or walnuts adds a delicate richness and texture, while also enhancing the crust with a more rustic, artisanal feel, contributing a nutritious element to a tart base.
Egg – Functions as a binding agent, assisting the dough in coming together while imparting some richness and stability.
Cold water – Crucial for uniting the dough without excessive handling. Adding it gradually ensures that the crust remains soft rather than tough.
Sugar and salt – Harmonize the taste, amplifying both the sweetness of the filling and the buttery elements of the crust.
For the Custard Filling (Dairy and Non-Dairy Variants)
For the Custard Filling (Dairy & Non-Dairy Variants)
- Eggs
- Mascarpone or full-fat coconut cream
- Sugar
- Pinch of salt
- Vanilla, orange blossom, or citrus zest
Choosing the Appropriate Custard for Your Tart
This fruit tart recipe is crafted to be adaptable, providing both a traditional dairy custard and a dairy-free option without compromising on texture or flavor.
Mascarpone custard (dairy choice) – Produces a lavish, creamy filling with a slightly tangy finish. This alternative offers a classic French-style fruit tart filling that complements berries beautifully.
Full-fat coconut cream (dairy-free choice) – A velvety and stable substitute that sets well when baked. It provides a light coconut fragrance and pairs excellently with citrus zest and blueberries.
Eggs – Supply form to the custard, enabling it to set gently while remaining creamy.
Sugar – Sweetens the custard while counterbalancing the natural tartness of the fruits.
Flavorings (vanilla, orange blossom, citrus zest) – These enhance the entire tart. Vanilla keeps it traditional, orange blossom lends a floral touch, and citrus zest brightens the flavor for a more refreshing dessert.
For the Fresh Fruit Topping
- Strawberries
- Blueberries
- Raspberries
Optimal Fruit for Seasonal Tarts
Fresh fruit is what elevates this tart into a seasonal centerpiece.
Strawberries – Sugary and succulent, ideal for a classic fruit tart appearance. Slice them for a more refined presentation.
Raspberries – Mildly tart and vivid, providing contrast and sophistication to the completed tart.
Peaches – Sweet and juicy, caramelizing delightfully if baked atop the custard.
Blueberries – Soft and mild, offering a deeper, jammy flavor that blends exceptionally well with coconut cream custard.
For optimal results, select fruit that is ripe yet still firm. This keeps the tarts visually appealing and prevents excess moisture from softening the custard.
Optional garnishes:
- Powdered sugar for a soft, bakery-style appearance
- Warmed jam glaze for shine and preservation
- Shredded coconut for texture and enhanced flavor
Tools You’ll Require For Ideal Fruit Tarts
- Mixing bowls (various sizes)
- Food processor or fork
- Rolling pin
- Tart pan or mini tart molds
- Baking sheet
- Parchment paper
- Whisk
- Wire cooling rack
Why These Tools Are Important (and How They Aid Your Success)
Food processor or fork – Aids in incorporating the butter or coconut oil into the flour efficiently, achieving that perfect crumbly texture required for a delicate tart crust.
Mixing bowls – Utilizing distinct bowls for crust and custard maintains organization and guarantees thorough mixing.
Rolling pin – Enables you to uniformly roll out the dough, which is essential for consistent baking and deterring thin or uneven areas.
Tart pans – These assist in molding the dough and forming the distinctive crisp edges. Mini tart pans are particularly handy for hosting, brunch setups, or single servings.
Mason jar lids (optional alternative) – A straightforward, inventive solution for shaping individual tart shells if specialty pans are unavailable.
Baking sheet – Positioning tart pans on a baking sheet simplifies the process of transferring them in and out of the oven while capturing any spills.
Parchment paper – Averts sticking and helps guarantee the tart shells detach cleanly without breaking.
Whisk – Crucial for crafting a smooth, lump-free custard filling.
Wire cooling rack – Facilitates air circulation around the tarts, aiding in uniform cooling and preventing sogginess.
Expert Tips for Optimal Outcomes
- Refrigerate your tart dough before baking to prevent shrinkage
- Utilize full-fat coconut cream for a consistent dairy-free custard
- Steer clear of overfilling the shells; the custard should rise to about halfway
- Allow tarts to cool entirely before adding fruit for the best texture and appearance
Creating Seasonal Fruit Tarts (step-by-step)
Step 1: Prepare the Tart Crust Dough
In a sizable mixing bowl or food processor, blend the flour and butter (or coconut oil). Incorporate the fat into the flour until the mixture resembles coarse crumbs.
Integrate the crushed nuts, sugar, and salt, and stir until fully combined.
Whisk in the egg, then incorporate cold water one tablespoon at a time, mixing gently until the dough forms.
The dough should be:
- Soft yet not sticky
- Simple to press and roll
- Not dry or crumbling
Tip: Adequate hydration is vital for creating a tender, flaky tart crust without overworking the dough.
Step 2: Roll Out and Shape the Tart Shells
Move the dough to a lightly floured surface and roll it to approximately ¼-inch thickness.
Gently press the dough into a tart pan or mini tart molds, ensuring to:
- Press evenly along the bottom and sides
- Prevent stretching the dough (which can lead to shrinking)
Trim any excess dough and crimp the edges as desired.
Optional: Refrigerate the tart shells for 15-20 minutes before baking to help maintain their shape.
Step 3: Create the Custard Filling
In a medium bowl, whisk together:
- Mascarpone or full-fat coconut cream
- Sugar
- Eggs
- Pinch of salt
- Vanilla, orange blossom, or citrus zest
Whisk until the combination is smooth, airy, and entirely blended.
Tip: A thoroughly mixed custard guarantees even baking and a silky mouthfeel.
Step 4: Fill and Assemble the Tarts
Pour the custard into the prepped tart shells, filling each about halfway up the walls.
Avoid overfilling, as the custard will slightly enlarge during baking.
Set the tart pans onto a parchment-lined baking tray for simple transfer.
Step 5: Bake Until Golden and Set
Bake in a preheated 350°F oven for 20-25 minutes, or until:
- The crust is lightly golden brown
- The custard is set but remains slightly soft in the center
Tip: The custard will further solidify as it cools, hence avoid overbaking.
Step 6: Cool the Tarts Properly
Take the tarts from the oven and relocate them to a wire cooling rack.
Let them cool completely prior to adding fruit.
Why this is significant: Adding fruit too soon may cause the custard to loosen and alter the ultimate texture.
An exception would be peaches, which can actually caramelize during baking due to their high natural sugar content. A few fresh peaches can be added for decoration following baking.
Step 7: Add Fresh Fruit and Finish
Crown the cooled tarts with your selection of fresh strawberries, peaches, raspberries, or blueberries.
Complete with:
- A dusting of powdered sugar
- A light application of warmed jam for shine
- A sprinkle of shredded coconut
Serve immediately or chill slightly before presenting.
FAQ
Can I prepare these tarts in advance? Yes. Bake the crust and custard a day prior, then add fruit just before serving.
Can I freeze the tart crust? Absolutely. Freeze unbaked shells in a sealed container.
What’s the optimal dairy-free alternative? Full-fat coconut cream is ideal for texture and stability.
Why is my crust too dry or overly sticky? Adjust with small amounts of cold water or flour until balanced.
Can I use different fruits? Yes, blackberries or figs work splendidly.
- Crust
- 8 oz Butter or coconut oil cold
- 1 3/4 cups All-purpose flour or gluten-free more for dusting
- 1/2 cup Nuts, crushed see notes for nut allergies
- 2 tbsp Sugar
- 1/2 tsp
Sodium
- 1 Hen’s egg beaten with a fork
- 2-4 tbsp Chilled water as required
- Dairy or Plant-Based Custard
- 8 oz Mascarpone or full-fat coconut milk at room temperature
- 1/2 cup Sweetener
- 3 Eggs at room temperature
- 1/4 tsp Sodium
- 1/2 tsp Flavoring orange blossom or vanilla
- 1 tbsp Citrus peel (optional)
- 1 1/2 cups Fresh produce
- 1/2 cup Preserve (optional)
- 2 tbsp Confectioners’ sugar (optional)
-
Pastry
-
Utilizing a fork, or in a food processor, blend the butter (or coconut oil) into the flour until the blend resembles coarse crumbs.Incorporate chopped nuts, sweetener, and salt, then mix.Gradually introduce the pre-mixed egg along with 1 tablespoon of water at a time until the mixture comes together. It should be neither sticky nor overly dry. Adjust water and flour to attain this balance.
-
Roll the dough out on a floured surface, achieving a thinner consistency than a traditional pie crust, roughly 1/8 inch thick.Cut circles from the dough using a cup that matches the diameter of the sides and bottom of the lid or tart pan, about 4 inches (if employing wide-mouth Mason jar lids), and press the rounds into the lid.Flute the edges, and the crust is good to fill and bake, or to freeze in a sealed container.
-
Custard
-
For a luscious filling, whisk together the cream (of choice), sweetener, eggs, salt, and flavoring in a medium bowl until smooth and airy. Evenly distribute into prepared tart shells, filling them about halfway.Place onto a baking sheet lined with parchment paper. Bake for 20 – 25 minutes until the pastry turns golden and the custard sets. Allow to cool on a wire rack.
-
Topper
-
If using strawberries, slice them thinly and arrange them in a fan shape atop each baked tart while maintaining the integrity of the strawberry shape.For berries, position them artistically on the baked tarts. If dusting with confectioners’ sugar, do so just before serving.If glazing the fruit with jam for an added sheen, now is the time to do it.
For those with nut sensitivities, simply substitute the chopped nuts with additional flour.
If you recreate these seasonal fruit tarts, I’d love to see your take, whether you stick to the classic mascarpone or opt for dairy-free coconut cream.
Feel free to leave a comment below or tag me so I can see which fruits you selected. And if you’re compiling recipes for spring and summer gatherings, don’t forget to save this for later.
Post Comment